
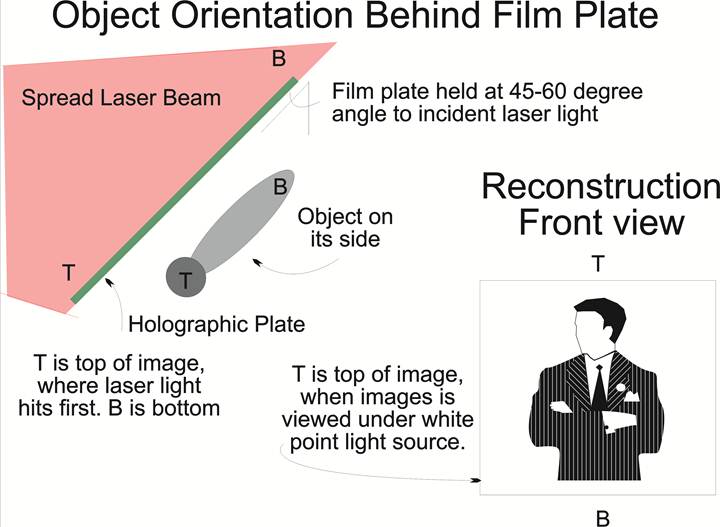
Figure 12 How to orientate object behind holographic film plate
The point at where the spread beam first touches the plate is label point T, with our side lighting setup this is the top of the plate. It will also me the top of the holographic image. Therefore it should also be the top of your model.
Table Set Up
Our holographic set up on the table is shown in figure 13, it is simple and minimal.
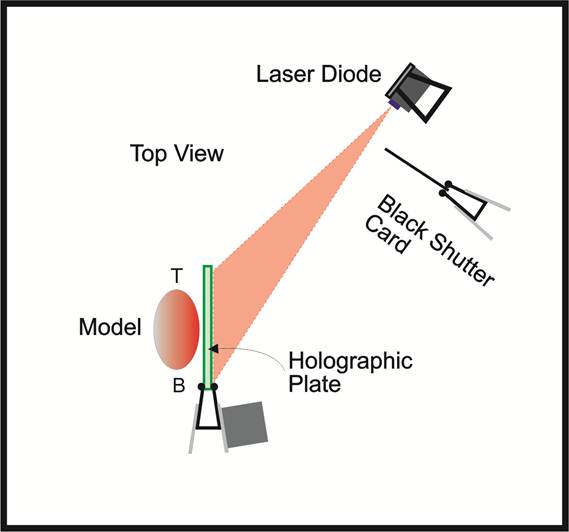
Figure 13 Diagram of holographic table set up.
Figure is a photograph of the setup on a 12” x 12” isolation table, with the object, film and laser diode.
Black Shutter Card
A shutter card is made from a black non-glossy piece (approximately 2.5" x 2.5") of cardboard. One medium size binding clip on the side of the card make it freestanding on the table, see figure . Do not use magnets on the shutter card's binding clip because we need to be able to lift the shutter card easily.
The shutter card blocks and unblocks the laser light from the diode to expose the holographic film.To expose the holographic film you lift the card off the table. When the exposure is complete, 10 minutes later, you place the black card back down in front of the laser diode.
White Card
A white piece of cardboard, approximately the same size as our film plate (2 x 3") and is used to set up the table. Arrange the components on the table as shown in figure 14.
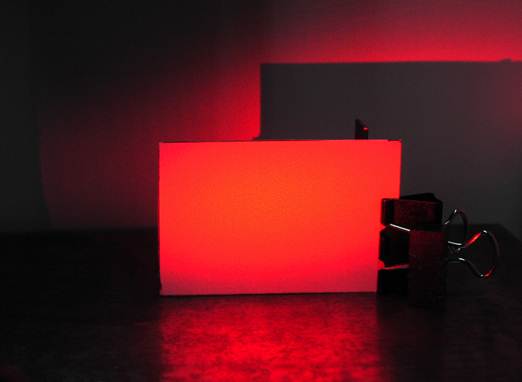
Figure 14 White card illuminated with laser diode with lens removed
Use the white card where you will place the film. Direct the spread laser light onto the white card. Make sure the beam strike the card at around a 45 degree angle. The white card makes it easy to see the laser light. Move the diode so that laser light fills the white card as evenly as possible.
Next position the object you are shooting behind the white card.
Remove the white card, leaving behind the binding clip in position. The laser light should now be illuminating the object. Look at the object from the laser side, this is the view of your finished hologram.
Block the laser light using the shutter card. With all the lights off remove a film plate from its light tight box. Holding the plate by its edges. Close the film box and turn on your safe light. Place the holographic plate in the binding clip that was holding the white card.
Using the safelight make sure the bottom edge of the glass holographic plate and metal binding clip are flush with the surface of the table. This insures maximum stability.