The first test to perform is a simple static test. Wear eye protection when pressurizing the air muscle. Attach one end of the air muscle to a stationary object using the loop. At the other end hang about 5-6 lbs. of material to the air muscle using the other loop. This weight will load the air muscle (cause the air muscle to stretch). Pressurize the air muscle with approximately 50-psi. The air muscle should contract and easily lift the weight. While pressurized, listen for any air leakage. Repair any air leak, by tightening the 24-gauge wire.
First Mechanical Device
This first device illustrations the function and measures the contract obtained with the air muscle, see figure 9. The air muscle is mounted to a piece of 1" x 2" lumber approximately 16" long. One end of the air muscle loop is looped over a wood screw secured into the wood. A thick rubber band is looped through the air muscle loop on the other end. The rubber band is pulled until the air muscle is just fully extended. Do not extend or pull the rubber band any further as this will just added additional resistance to the air muscle and not contribute to its function. A woodscrew is secured into the wood at this point and the rubber band is looped over the screw. When you pressurize the air muscle you can measure its contraction. Release the air pressure from the muscle and it should extend into its relaxed position.

Second Mechanical Device
A lever is a simple mechanical device. A mechanical drawing is shown in figure 10 and photograph of a lever is shown in figure 11. Activating the air muscle causes the lever to rise. In the lever we are using a number of rubber bands to load the air muscle.
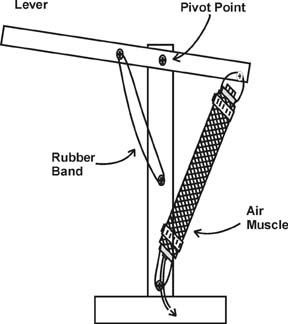
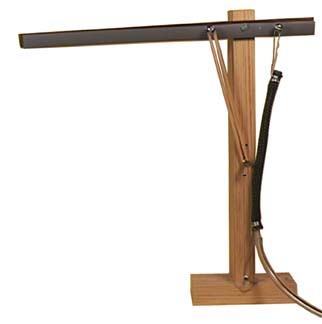
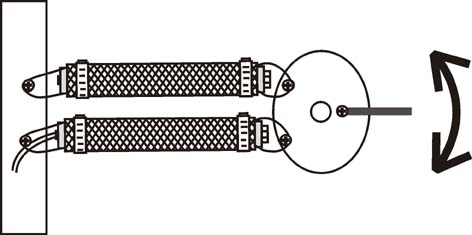
Figure 12 illustrates how two air muscles may be configured to provide a counter force or load for each other.